Multiblock Arrays
A WolfArray object stores data in a matrix format, leveraging Numpy arrays for efficient numerical operations.
A WolfArrayMB object organizes data as a dictionary of WolfArray objects, effectively creating a tiled structure of multiple WolfArray instances. This structure allows for seamless handling of datasets that are too large to fit into a single array, enabling efficient data manipulation and analysis.
Each block can be parameterized independently, offering flexibility in data representation.
The WOLF CPU code is designed to work with multiblock models. The WolfArrayMB class ensures compatibility with the Fortran-based WOLF code, maintaining consistency and interoperability between the two implementations.
[ ]:
# import _add_path # add parent directory to path - debug mode only
from wolfhece.wolf_array import WolfArray, WolfArrayMB, header_wolf
import numpy as np
Creating a Multiblock Array from scratch
You need multiple WolfArray objects to create a WolfArrayMB object.
[2]:
h1 = header_wolf()
h1.shape = (10,10) # 10x10 pixels
h1.set_resolution(1.,1.) # 1x1 meters per pixel
h1.set_origin(-1.,-1.) # origin at (-1.,-1.) meters
h2 = header_wolf()
h2.shape = (5,5) # 5x5 pixels
h2.set_resolution(0.5,0.5) # 0.5x0.5 meters per pixel
h2.set_origin(15.,15.) # origin at (15,15) meters
block1 = WolfArray(srcheader=h1)
block2 = WolfArray(srcheader=h2)
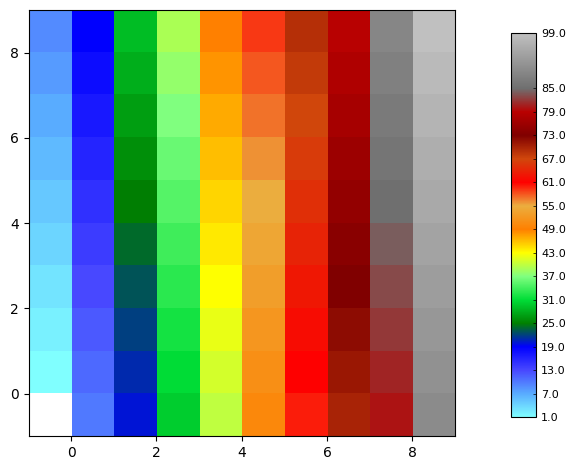
block1.array[:,:] = np.arange(100).reshape((10,10)) # Populate with 0-99
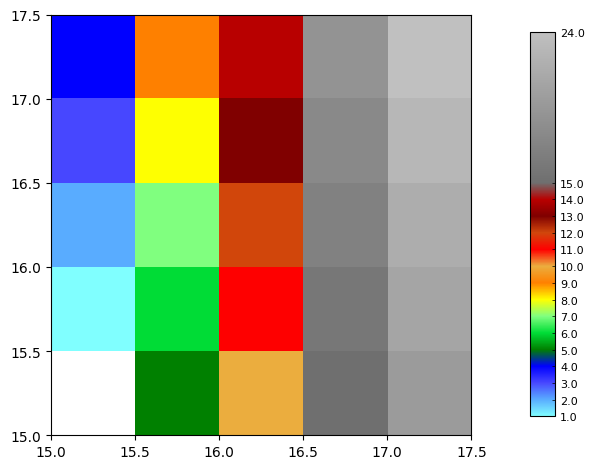
block2.array[:,:] = np.arange(25).reshape((5,5)) # Populate with 0-24
# Print the blocks
block1.plot_matplotlib(with_legend=True)
block2.plot_matplotlib(with_legend=True)
D:\ProgrammationGitLab\HECEPython\docs\source\tutorials\../../..\wolfhece\wolf_array.py:10215: UserWarning: This figure includes Axes that are not compatible with tight_layout, so results might be incorrect.
  fig.tight_layout()
D:\ProgrammationGitLab\HECEPython\docs\source\tutorials\../../..\wolfhece\wolf_array.py:10215: UserWarning: This figure includes Axes that are not compatible with tight_layout, so results might be incorrect.
  fig.tight_layout()
[2]:
(<Figure size 640x480 with 2 Axes>, <Axes: >)
[16]:
mb = WolfArrayMB() # a void WolfArrayMB()
mb.add_block(block1, force_idx=True) # add the first block - by reference
mb.add_block(block2, force_idx=True) # add the second block - by reference
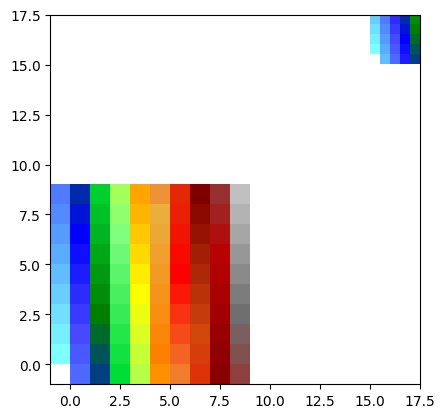
mb.set_header_from_added_blocks() # construct the header from the added blocks
mb.plot_matplotlib()
print(mb)
# In the mb header :
# - The shape os the mb is (1,1)
# - The origin is the lower-left corner of the added blocks
# - The resolution is the footprint of the added blocks
Shape  : 1 x 1
Resolution  : 18.5 x 18.5
Spatial extent :
   - Origin : (-1.0 ; -1.0)
   - End : (17.5 ; 17.5)
   - Width x Height : 18.5 x 18.5
   - Translation : (0.0 ; 0.0)
Null value : 0

Number of blocks : 2

Block block1 :

Shape  : 10 x 10
Resolution  : 1.0 x 1.0
Spatial extent :
   - Origin : (-1.0 ; -1.0)
   - End : (9.0 ; 9.0)
   - Width x Height : 10.0 x 10.0
   - Translation : (0.0 ; 0.0)
Null value : 0.0

Block block2 :

Shape  : 5 x 5
Resolution  : 0.5 x 0.5
Spatial extent :
   - Origin : (15.0 ; 15.0)
   - End : (17.5 ; 17.5)
   - Width x Height : 2.5 x 2.5
   - Translation : (0.0 ; 0.0)
Null value : 0.0
By Reference or By Value?
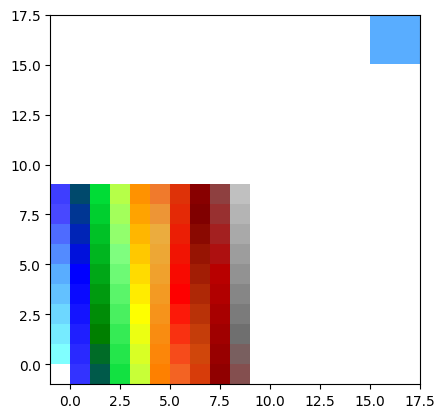
When adding a block to a WolfArrayMB object, you can choose to add it either by reference or by value.
By Reference: By default, the
add_blockmethod does not create a copy of theWolfArrayobject. This means that any modifications to theWolfArrayMBobject will directly affect the originalWolfArrayobject, and vice versa.By Value: If you want to create a copy of the
WolfArrayobject while adding it, you can set thecopyparameter toTrue. This ensures that the originalWolfArrayobject remains unchanged, even if theWolfArrayMBobject is modified.
Key Considerations:
Adding by reference is memory-efficient but links the objects, so changes in one will reflect in the other.
Adding by value ensures independence between the objects but requires additional memory for the copy.
[17]:
block2.array[:,:] = 5.
mb.plot_matplotlib() # plot the mb again
[17]:
(<Figure size 640x480 with 1 Axes>, <Axes: >)
Accessing the Blocks
Blocks within a WolfArrayMB object are stored in the myblocks dictionary and can be accessed using their keys.
Key Format
The keys follow the format blockn, where n is the block number (1-based index). For example:
The first block has the key
block1.The second block has the key
block2.
Access Methods
You can access blocks in two ways:
Using Keys: Access blocks directly using their string keys, e.g.,
mb.myblocks['block1'].Using Indexing: The
__getitem__method allows you to use Python’s 0-based indexing convention, e.g.,mb[0]for the first block.
This flexibility makes it easy to retrieve and manipulate individual blocks within the multiblock array.
[ ]:
# keys
print(mb.myblocks.keys()) # get the keys of the blocks

ref1 = mb[0] # get the first block
ref2 = mb['block1']

print(ref1.is_like(block1)) # check
print(ref1.is_like(ref2)) # check
dict_keys(['block1', 'block2'])
True
True
Convert to WolfArray “single” block
The WolfArrayMB object can be converted to a single WolfArray object using the as_WolfArray method. This method concatenates all blocks and rebin if necessary.
[ ]:
single = mb.as_WolfArray() # convert to a single WolfArray

print(single)

single.plot_matplotlib() # plot the single WolfArray
Shape  : 37 x 37
Resolution  : 0.5 x 0.5
Spatial extent :
   - Origin : (-1.0 ; -1.0)
   - End : (17.5 ; 17.5)
   - Width x Height : 18.5 x 18.5
   - Translation : (0.0 ; 0.0)
Null value : 0.0
(<Figure size 640x480 with 1 Axes>, <Axes: >)

And More…
WolfArrayMB philosophy plays a crucial role in the WOLF code, especially within the Wolfresults_2D class, where the same idea is used to store and manage the results of 2D simulations. The ability to handle large datasets efficiently makes it indispensable for complex numerical workflows.
To gain a deeper understanding of how WolfArrayMB is utilized in the WOLF codebase, explore the source code and documentation. This will provide valuable insights into its integration and application in real-world scenarios.